In
Part 1 I covered the reasoning for choosing a container and the performance gains that resulted in the build process.
Creating the container image
I’m not the first person to think of using a container for an Azure DevOps build agent by any means. There are a number of people who’ve blogged about it and you can get pre-configured, Microsoft created Azure DevOps agent Dockerfiles from
Docker Hub. The problem with what’s on Docker Hub and most of the blogs is that most everything is Linux. Fine if you want to build .NET Core projects but Dynamics 365 CE needs the regular .NET Framework which isn’t going to run on Linux. From what I could see, Microsoft doesn’t have a Windows based agent on Docker Hub so I set off to build my own.
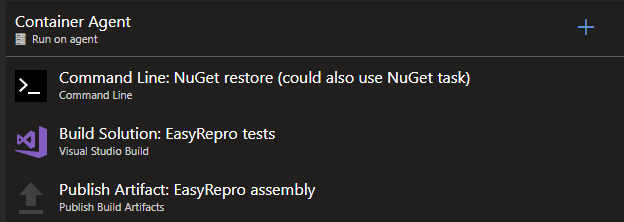
Remember the goal was to create a build server that could be used to build and test things developed for Dynamics 365 CE. So that means being able to build and test .NET based plug-ins / workflows, JavaScript / TypeScript, run headless
EasyRepro / Selenium UI tests, and be able to deploy as needed. Here’s what I came up with. I’m sure it’s probably not the best or cleanest way of going about this, but it works.
Dockerfile
start.cmd
start.ps1
Dockerfile
Image Creation BasicsAs you can see, to get software above and beyond what comes on the base OS image you need to write PowerShell or DOS commands to obtain and install.
When looking through the script and you see this, that means the follow commands are executed in PowerShell.
SHELL ["powershell", "-Command", "$ErrorActionPreference = 'Stop'; $ProgressPreference = 'SilentlyContinue';"]
When you see this, that means the follow commands are executed at the Windows command prompt.
SHELL ["cmd", "/S", "/C"]
Everything that get executed starts off with
RUN (environment variables are
ENV) and you’ll notice that multiple commands are chained together to execute in one batch. The reasoning for this is due to the way Docker assembles or layers the images. Each RUN command creates a new layer on top of the OS with the changes made. Layers are cached for reuse as the image is assembled. The more items you can group together, the less layers you end up with. This can be a good or bad thing.
If there’s a failure building the image on a particular layer, instead of starting over from the beginning (and potentially wasting a lot of time) it will used the cached layers and start again at the one that failed. If the failure happens in the middle of 12 items chained together, it will have to start over at the first item in that layer. If you successfully create an image and then make a change someplace in the middle, it will use the cached images prior to the change but then need to re-perform all the actions on subsequent layers as that change might effect them. As such, it’s better to put the items that will change the least first and then work your way up toward ones that might get versioned more frequently. If I revise this image I’ll probably put more thought into that and reorder some things.
Some of these commands aren’t easy to test and escaping characters combined with environment variables and file paths with spaces in them gets pretty confusing. I ended up doing a lot of trial and error to get some of those combinations correct which was frustrating but it would have been even worse had the image creation needed to start from scratch each time.
Base imageI ended up using this image:
microsoft/dotnet-framework:4.7.2-runtime-windowsservercore-ltsc2016
I had originally picked a later build of Windows Server Core but when I went to deploy to the Azure Container Registry (ACR) I found out that it doesn’t support that version of the image so I had to start all over with this image. ACR only
supports Long-Term Servicing Channel (LTSC) versions of Windows. LTSC being versions of Windows that will be supported for 5 years and then have 5 additional years of extended support. It should also be mentioned that you don’t need to acquire the base OS for the container if you’re using something from a public repository. If you are using Docker to build the image, it will automatically download the image for you to use. This could be just an OS, or an OS with software already installed. In that case buyer beware I suppose. As far as licensing is concerned, Windows 10 allows you to run containers for development purposes. For production use, the Windows Server license of the host covers containers. I’m assuming then if you’re running the container in Azure, licensing is also covered.
NuGetDownloads and installs NuGet.exe so we don’t have to use the Azure DevOps NuGet build task later.
Visual Studio Build Tools & Web TargetsThis downloads and installs the Visual Studio test agent, base build tools, and the specialized build tool packages for the different things related to Dynamics 365 CE we might want to build. It also removes the install files once complete. You’ll notice it’s installing the test agent but it doesn’t seem to be compatible with what is required for running tests from Azure DevOps. What it does do is ensure the agent reports to Azure DevOps the test agent is installed to satisfy
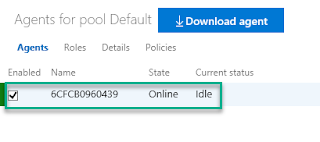
build task demands. If the agent doesn’t show it meets the demands or requirements needed to run the build, it won’t even start. You could skip this and manually edit the list of demands for the agent in Azure DevOps, but the downside is that you’d need to do it for every hostname the container gets. When you stop and start a container it receives a new and different hostname which then shows up separately in the list of build agents. Not a big deal but after awhile you’ll end up with a long list of dead agents that will need to be manually deleted. There’s probably an API someplace for that but the ideal solution would be to figure out a way to set or keep the same hostname each time. That might not be possible considering you can start any number of container instances and having the same name probably wouldn’t fly.
Path VariablesSo things like NuGet can be executed from anyplace in the file system.
.NET Targeting PacksFor building against different versions of the .NET Framework.
Build AgentThis installs the build agent software so the container can communicate with Azure DevOps. This url comes from Agent Pools page.
PowerShell ModulesThis sets up NuGet.org as a package provider and installs the Azure and Dynamics 365 CE specific PowerShell modules we might need later. Having these pre-installed should prevent the need to import them each time in scripts requiring them.
Suppress Error DialogsNot sure this is 100% necessary but these registry entries should prevent Windows error dialogs which might hang something up.
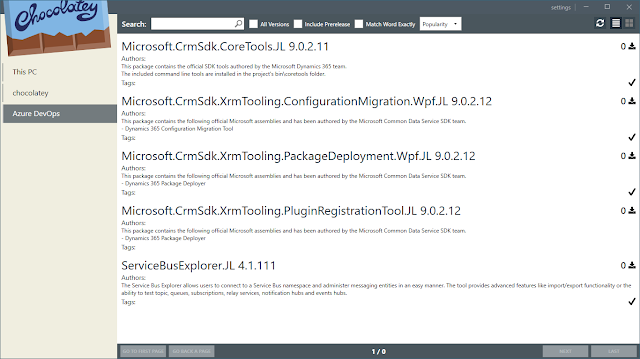
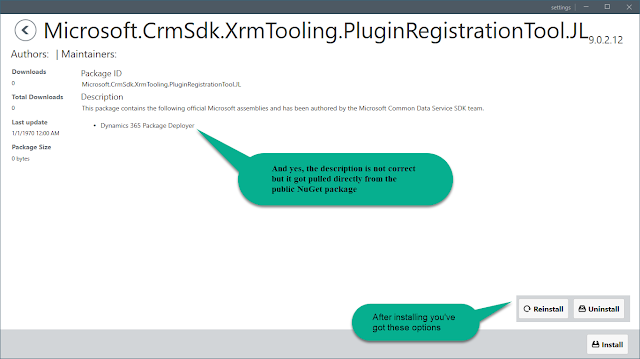
Chocolatey InstallsDownloads and installs
Chocolatey which then can be used to download other software packages. In this case Git, Node.js, and the Azure CLI. If you aren’t familiar with Chocolatey it’s package management for applications. Lots of commonly used software can be installed and updated from here via script.
NPM InstallsGrunt and gulp task runners.
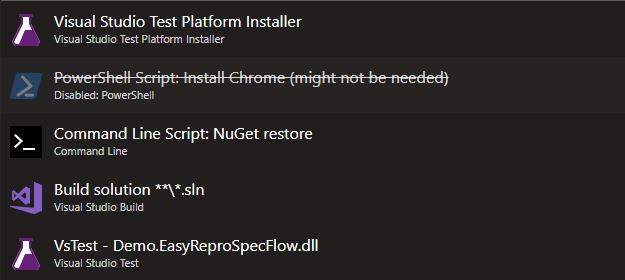
Google Chrome InstallI tried installing Chrome via Chocolatey but ended up having problem getting it to work. It’s hard to say if that version was the issue or if something else might have been wrong with the image during the testing. Once installed it appears to be v71 which is the latest while I’m writing this. I’m not 100% sure what’s special about the version that comes from the url I’m using but it seems to be used widely across the internet for silent installs. I should also point out that EasyRepro currently supports v2.38 of the Selenium Chrome driver. That version only lists official support for Chrome v65 – 67. So maybe it’s just luck that it works and this is an unsupported set up. I tried updating the Chrome driver to a version which supports the latest Chrome browser version and then had issues running the tests. Since that’s all kind of a mess I’d recommend just sticking to a known working combination like this.
Start.cmd
Just used to run start.ps1.
Start.ps1
This is used to configure and start the build agent when the container starts. I pulled this from the blog which is noted at the top. This needs your Azure DevOps instance name and a Personal Access Token (PAT) in order to connect to your agent pool. I’m sure there is probably a better way of handling those values other than hard-coding them into this file, I just haven’t had a chance to look for it yet.
Conclusion
I’m glad I took the time to work through setting up a container because I learned a lot. I’m also glad I wrote these 2 blogs, when digging into the how’s and why’s I learned a lot more.