EasyRepro
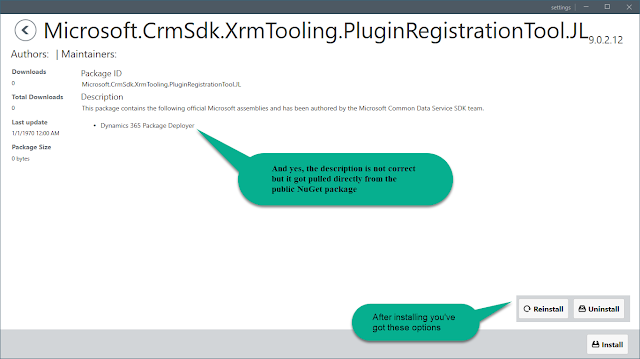
If you hadn't heard about it already, EasyRepro is a UI testing framework for Dynamics 365 CE built on top of Selenium which is one of the more popular UI testing frameworks available today. Those who might have tried using Selenium directly with D365 CE in the past only found pain and suffering. For most people that ultimately lead to the conclusion that it wasn't worth investing huge amounts of time creating tests for little upfront return. In my opinion EasyRepro now makes creating UI tests feasible as it abstracts away most of complexities involved with Selenium development and boils down CE interactions to a single line of code in many cases. At the same time it’s still flexible enough to extend or use underlying core Selenium functionality. If you’re at all interested, download the Git repository and give it a test drive.Running Tests in Azure DevOps
Once you've cloned the EasyRepro project and ran some of the examples on your local machine you'll quickly realize that you can't tie it up all day running tests. So if you’re planning on running dozens or hundreds of these tests you’ll need to find an alternative place to run them from. Azure DevOps (ADO) can be that alternative because it offers solutions for 2 different scenarios when it comes to running automated tests. These being running a group of tests as part of a build & release pipeline and the other being able to have a non-developers run individual tests on demand.Project Set Up
For example purposes I'll use a Visual Studio test project referencing the Dynamics365.UIAutomation.Api (EasyRepro) libraries from NuGet. I've additionally added in a reference to Microsoft.Azure.KeyVault to handle credentials so we don't need to worry them getting into source control or having to worry about replacing them in any of the ADO processes. For this example we’ll just be using Google Chrome as the browser of choice for testing.Build Set Up
Assuming tests are created and things are working locally, get the project checked into ADO so we can set up a build. It's going to work like a normal .NET project build.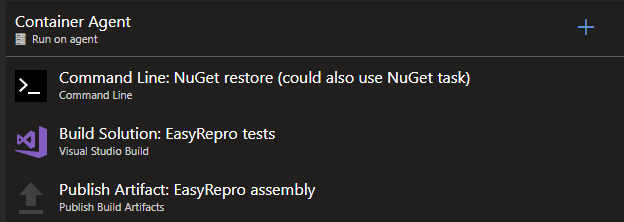
Start off by creating a new build in ADO using an empty job. I’ve got a repository with the EasyRepro test project that I’m pulling the source from initially. This is executing on a private build agent (running inside a Window container) so I’m just using the command line to do a NuGet restore but you could also use the standard NuGet build task. Build the solution or project like normal using the release configuration. Then probably the most important step, use the Publish Build Artifacts build task to publish the bin/release folder to Azure Pipelines/TFS. This is what makes the compiled assembly and other references available to the release we’ll be setting up to run this.
To keep things updated, under Triggers, check Enable continuous integration so that the project gets rebuilt and published each time an update is made.
Release Set Up
In order for ADO to be able to run tests on demand we need to create a release pipeline. Again don’t start with an existing template, just pick the empty job. Select Artifacts & Add and then choose Build and use your project and the build pipeline you just created as the source. You have a few different options for the default version to use but I’d probably set it to use the latest each time.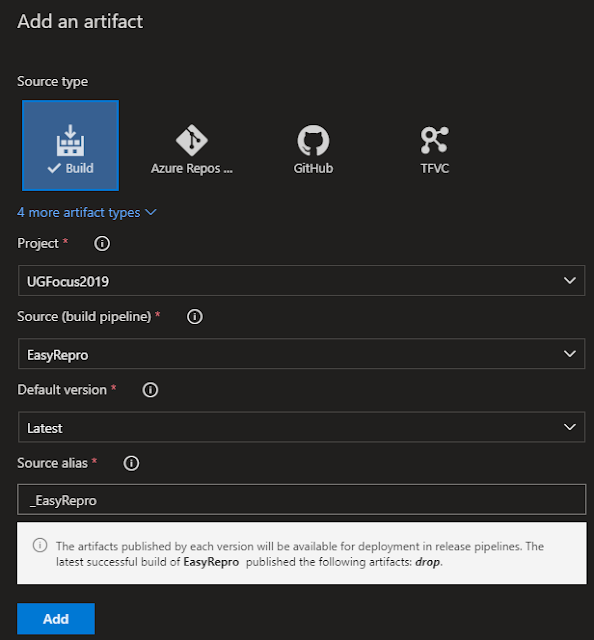
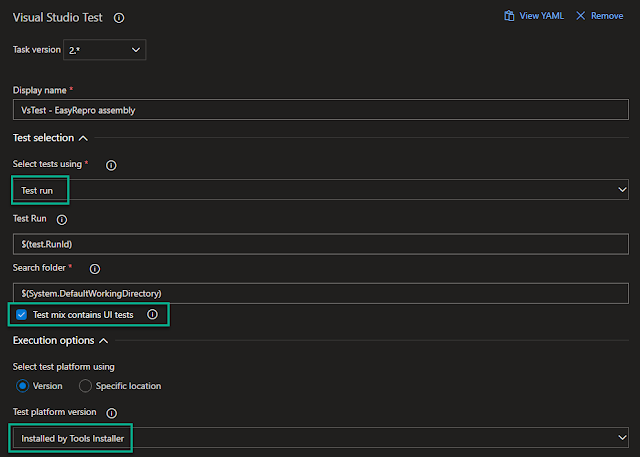
In the first and only stage, open the tasks to begin setting up the test run. I start with a Visual Studio Test Platform Installer task. You might need this if you’re running a private build agent. If you’re using a Microsoft hosted agent you shouldn’t need this because it’s already installed but it being there won’t hurt anything. Then add a Visual Studio Test task and user version 2.*. Pay close attention to the configuration. Select tests using aTest run. Make sure the box is checked that indicated the Test mix contains UI tests. Last, make sure the test platform version is using the version Installed by Tools Installer.
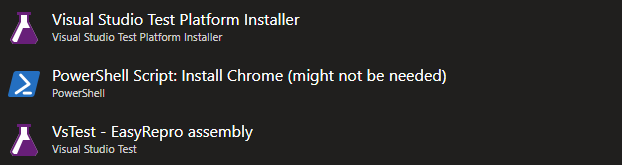
Depending on the build agent, you may or may not need to install Chrome (or other browsers for that matter). If things aren’t working, try installing it with the following PowerShell script:
$Path = $env:TEMP;
$Installer = "chrome_installer.exe";
Invoke-WebRequest "http://dl.google.com/chrome/install/375.126/chrome_installer.exe" -OutFile $Path\$Installer;
Start-Process -FilePath $Path\$Installer -Args "/silent /install" -Verb RunAs -Wait;
Remove-Item $Path\$Installer
Test Plan Set Up For Manual Test Execution
Hooking individual tests up to test cases is only required if you want the ability to run them on demand from the Test Plans area in ADO. It works better if you can link the release that was created to the test plan but I’m pretty sure you’ll need either VS Enterprise, Test Professional, MSDN or Test Manager to do so. If you’ve already got a test plan, right click on in and go to Test plan settings. Select the build that was just created and leave the build number at latest. Then choose the pipeline and stage from the release setup.
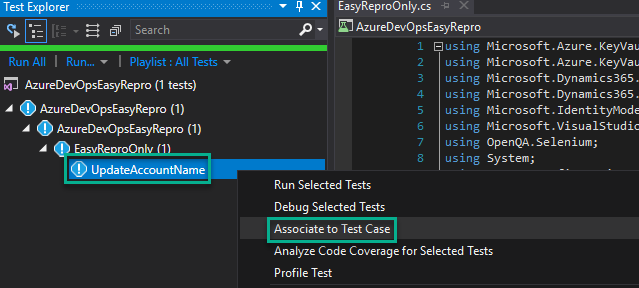
Assuming you’ve got a Test Case created that matches one of the EasyRepro tests, head back to the project in Visual Studio, open up Test Explorer, and find the test. Right-click on it and choose Associate to Test Case. It’s probably a good idea to make sure you’re connected to the project in ADO before you do this.
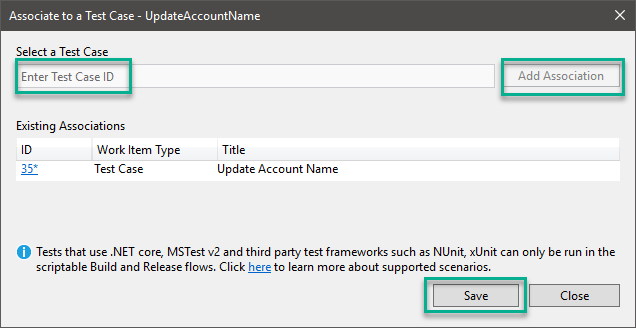
Type in the Test Case Id then Add Association. Save and close and when you open the test case in ADO, the automation status should now say ‘Automated’. Repeat for any other tests.
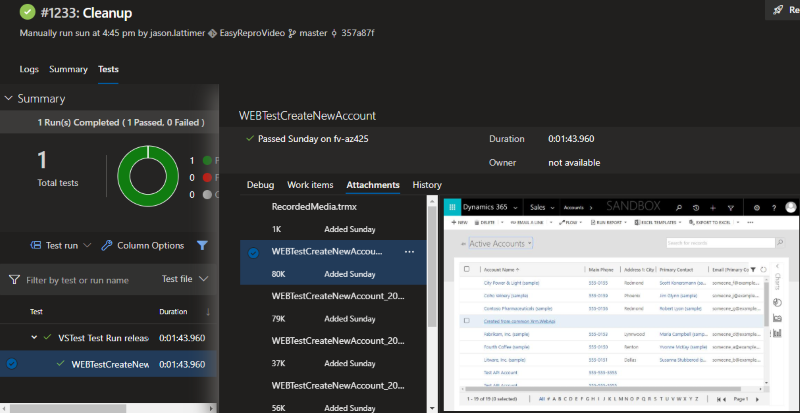
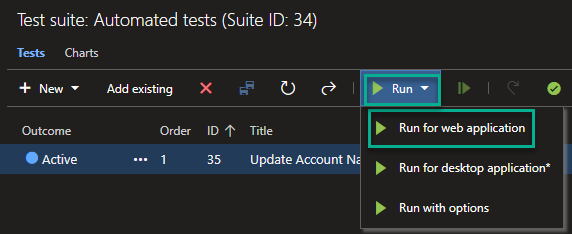
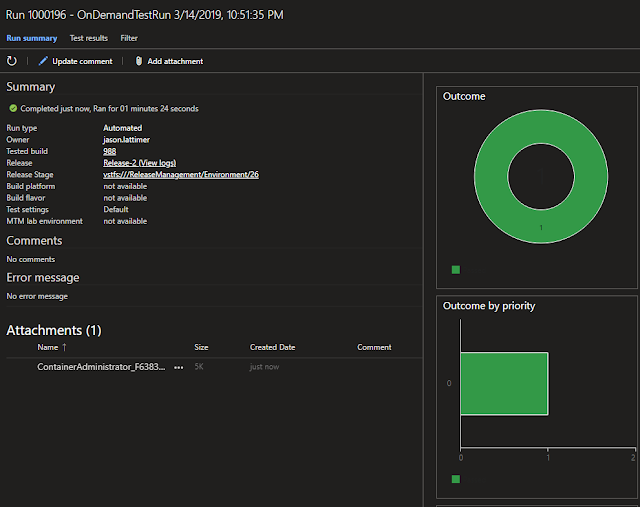
Under Test Plans you should be able to select individual or groups of tests and then under the green Run button pick Run for web application to execute. Having the release tied directly to the test plan saves the user having to choose that same data each time which is a few extra clicks and possible confusion.
A window will open confirming and validating the tests. If there aren’t any errors you can select View test run and sit back and wait for the tests to complete. With any luck they will, otherwise you’ll need to retrace your steps and figure out what’s wrong.

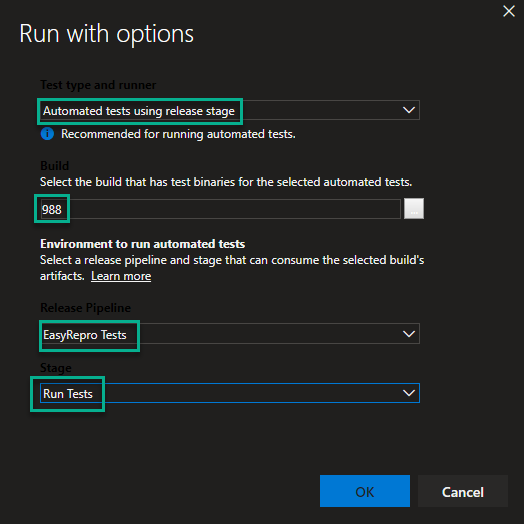
If you aren’t able to edit the test plan you can use Run with options and it will open a window where you can choose the items that got configured when linking at the test plan leave. When selecting the build the user will need to either know the build number or know enough to select find and the pick the correct (likely the most recent) build and pipeline from the list.
Running In Builds & Releases Automatically
Really it’s just a matter of combining the all the steps from the Build and Release setups above with the exception of the publish build artifact task.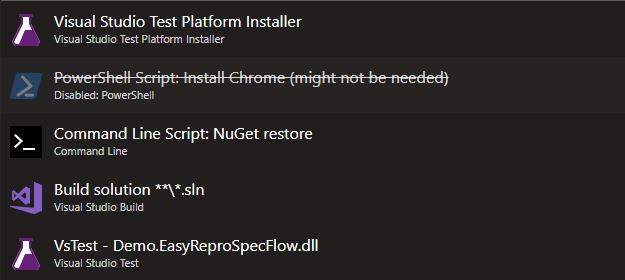
And that’s it. Not much to it once you figure it out so hopefully this saves you the trouble.